


Showing posts with label Minecraff Mod. Show all posts
Glacia Dimension Mod 1.7.2 - Game2share

Try a new glacial world with new trees, flowers, Snow-grass, dirt, rock, ores and much more! What are you waiting for? jump in the portal and start exploring!
Screenshots:


Mod Contents:
Blocks
- Magic stone = Portal frame
- Glacial grass = Snowy grass block
- Glacial dirt = Ice dirt block
- Glacial wood = Glacial tree wood
- Glacial leaves = Glacial tree leaves
- Glacial planks = Glacialwood made planks
- Glacial stone = Ice stone
- Crystal = New glacia ore
- Glacialwood stairs = New stairs
- Glacialwood slab = New slab
- Glacial door = A glacialwood door
- Snowy sand = A snowy sand block
- Glacial cobblestone = Ice cobblestone
- Ice (ore) = New glacia ore
- Glacialwood fence = A fence made of glacial wood
- Glacialwood fence gate = A fence gate made of glacial wood
- Crystal of power = A magic strange-shaped crystal
- Magic ice = A magic source of power
- Compact ice = A block made of compact ice ore
- Ice column = A pillar made of ice
- Granite column = An original pillar like greeks ued to
Plants
Glacial sapling = Grow into glacial trees
Ice flower = Snowy flower
Glacial berry plant = An attractive plant
Ice flower = Snowy flower
Glacial berry plant = An attractive plant
Items
Ores
- Crystal = Crystal ore
- Solid ice = Solid ice ore
- Magic stone piece = A misterious stone
Tools
- Crystal rod = A rod made of crystal
- Crystal sword = Sword made of crystal
- Crystal pickaxe = Pickaxe made of crystal
- Crystal axe = Axe made of crystal
- Crystal shovel = Shovel made of crystal
- Crystal hoe = Hoe made of crystal
- Ice rod = A rod made of ice
- Ice sword = Sword made of ice
- Ice pickaxe = Pickaxe made of ice
- Ice axe = Axe made of ice
- Ice shovel = Shovel made of ice
- Ice hoe = Hoe made of ice
- Ice dagger = Dagger made of ice
- Ice warhammer = Warhammer made of ice
- Ice bastard sword = Bastard sword made of ice
- Magic portal switcher = Like flint and steel but made of magic stone
- Glacialwood rod = A rod made of glacial wood
- Glacialwood sword = Sword made of glacial wood
- Glacialwood pickaxe = Pickaxe made of glacial wood
- Glacialwood axe = Axe made of glacial wood
- Glacialwood shovel = Shovel made of glacial wood
- Glacialwood hoe = Hoe made of glacial wood
Armors
- Crystal helmet = Helmet made of crystal
- Crystal chest = Chestplate made of crystal
- Crystal leggings = Leg armor made of crystal
- Crystal boots = Boots made of crystal
- Ice helmet = Helmet made of ice
- Ice chest = Chestplate made of ice
- Ice leggings = Leg armor made of ice
- Ice boots = Boots made of ice
- Misterious armor = Rare to drop armor
- Glacial turtle head = A beautiful trophy
- Glacial turtle shell = An hard shell
- Glacial turtle limbs = Lims cut from glacial paws
- Glacial turtle paws = Turtle style shoes
Food
- Glacial berry = A juicy fruit
- Saber-toothed cat meat = row meat
- Saber-toothed cat cooked meat = cooked meat
Other
- Misterious armor piece = A broken misterious armor’s piece
- Broken quadium bulb = A strange item, but broken
- Quadium bulb = This item have a great power
- Penguin feather = A soft feather
- Bluestone = A magic powder
- Quadium pearl = A magic item that comes from quadium bulb
- Return rune = Fast back to the world (WIP)
Mobs
- Glacial seeker = A snowy creature
- Penguin = A cute penguin
- Saber-toothed cat = A tiger with strange teeth
- Glacial turtle = An hostile icy turtle
- Raindeer = Cute raindeers
- Polar bear = An hostile bear
Achievements
- Glacia = Teleport in Glacia
- Glacial wood = Cut some wood
- One of us = Become a Glacial turtle
How to install:
- Download and install Minecraft Forge.
- Download the mod.
- Go to %appdata%.
- Go to .minecraft/mods folder.
- Drag and drop the downloaded jar (zip) file into it.
- If one does not exist you can create one.
- Enjoy the mod.

[UPDATED] TooManyItems 1.7.5 - Game2share.us

Create and enchant items in-game, including mod items. Save and load entire inventories. Create unlimited stacks and tools. Switch game modes, test mods, create huge survival worlds, and more. Updated quickly!
TLDR common issues: Not all features work in MP, and you need permissions. There is a config file in the same place as your saves folder. Does not require any other mods, but if you have ModLoader or Forge (not both!) infinite survival stacks will work properly. If it crashes, post the crash report (look in your minecraft folder for TMI's own error dumps). Use the correct version! Delete META-INF. Alt-click to remove favorites.
Copyright: All of TooManyItems except for the small portion excerpted from the original Minecraft game is copyright 2011-2013 Marglyph. TooManyItems is free for personal use only. Do not redistribute TooManyItems, including in mod packs. Making YouTube videos using TMI is good though!
Downloads
The following links have ads on them to provide some support for modding Minecraft. You are not required to click on the ads to download TMI; there is a skip button in the top right corner. You do not need to download any installers or download managers.
Non-Forge: Please refer to these jar mod installation instructions, or to your launcher's instructions if you are using a launcher.
Forge: Place the TMI jar into your mods/ or mods/<version> folder. May still have incompatibilities with other inventory mods.
* Sorry for slow updates, they will speed up soon *
Or:
Or:
----------------
Installing & Usage
Install: Read the Installing Mods page on the Minecraft Wiki. Search for Install TooManyItems on YouTube. The community has made lots of video tutorials. Thanks guys!
Turn On/Off: Press the "o" key while in the inventory screen. You can change this key by editing the configuration file.
Add items: Left-click on items in the right sidebar to add full stacks, or right-click to add one at a time.
Configuration file: Find the directory in which your minecraft saves folder and options.txt are, and once you have used TMI at least once you will also find TooManyItems.txt there. This contains options that you can change, not all of which are documented yet.
Spawners: In some previous versions, to create different kinds of spawners, edit the "spawner" line in the configuration file. Use at your own risk; in some (older) versions of Minecraft, spawners of non-mob entities such as boats can crash the game and wreck your save.
Unlimited stacks/tools (single-player only): Shift-left-click on items in the right sidebar to add unlimited stacks OR unlimited-use tools or flint and steel. ModLoader is required for "true" unlimited stacks. Without ModLoader the quantity of >64 stacks will refresh when you open your inventory.
Tabs: Use the chest, star, and book icons to change between the item, favorites, and enchant tabs.
Favorites: This allows you to save commonly used items. ADD to the favorites panel by: (1) clicking an item on the favorites panel, (2) alt-clicking an item in the items panel, or (3) clicking the Favorite button in the enchant panel. REMOVE an item from the favorites panel by alt-clicking it.
Enchanting: (in SP, or may work on some Bukkit servers) Click an item on the enchanting panel to switch to that type of item. Use the + and - buttons to change the levels of individual enchantments. Click the Create button to make the enchanted item once, or the Favorite button to add it to the favorites panel.
Trash (single-player only): Drop an item stack on the item sidebar or the trash icon to delete it. Click the trash icon to turn "delete mode" on and off (in "delete mode" you will delete any item you click on -- useful for selectively deleting a lot of items). Shift-click thee trash icon to wipe out your inventory.
Game mode: Click the "S", "C", and "A" icons on the toolbar for survival, creative, and adventure mode, respectively.
Time: Click the sun and moon icons to set the time to sunrise, noon, sunset, or midnight.
Difficulty: Click the creeper icon to toggle the difficulty without having to go into game preferences.
Health/hunger: Click the heart icon to set health and hunger to max.
Save states (single-player only): Several slots are available for you to save your entire inventory and restore it later. (The "x" button next to a saved state will remove it.) This can be used to save your "real" inventory before editing, save a blank inventory to clear out everything you're holding, save a full inventory of materials, share inventories between characters, etc.
Multiplayer: You need to be a server op. Also, every non-vanilla server works a little differently. The command issued to the server to give you items is configured in TooManyItems.txt as "give-command". In this command, you should put {0} for the player's username, {1} for the item ID, {2} for the quantity, and {3} for the damage value. If {3} isn't in the command, items with damage values other than 0 won't show up.
Vanilla server command: /give {0} {1} {2} {3}
* Since the vanilla server used to not support item damage with the give command, TMI may still have /give {0} {1} {2} by default. You can now add {3} to the end. The default will be updated in a future TMI version.
Bukkit with the Essentials mod command: /item {1}:{3} {2}
Fast crafting: Right-click on the output square when crafting to craft the maximum possible amount. (Works while the inventory overlay is disabled).
Troubleshooting
Crashes show an error report on a purple and white screen, and you can copy and paste the report into a post. With the latest version of TMI, most errors that would have crashed should instead show a chat message that says a report has been saved to a file in your minecraft folder, and you can copy and paste from that file into a post.
Black screens are caused primarily by: not deleting META-INF from your minecraft.jar, mod conflicts, wrong versions of mods, and improperly installing mods. Please check these things and, if necessary, start fresh from a new minecraft.jar as an old installation problem may still be causing errors.
"TMI doesn't show up": Press the "o" key in your inventory screen to turn TMI on and off. (Unless you have already changed this in your config file.) Your preference about whether TMI should be displayed is separate in single- and multi-player. If this still doesn't work, you probably did not install TMI correctly.
Notes: TMI's code does not run until you open your inventory. Problems creating games are something else. TMI does not change any crafting recipes. You are not forced to use fast crafting: just left click like normal instead of right clicking. Yes, TMI does work in multiplayer, but read the instructions. No, it is not a server mod. Finally, the number of pages of items depends on your Minecraft window size, so, you are not missing items because it doesn't have the same pages as in the screenshot.
Uninstalling: If you manually installed a mod, the only way to uninstall is to either restore your backup copy of minecraft.jar (you did make a backup, right?) or delete minecraft.jar and run the game launcher so it downloads a new minecraft.jar. If you used a mod manager, refer to its instructions.
Screenshot:

VoxelMap Mod 1.7.2 - Game2share.us

VoxelMap was originally Zan’s minimap, a rather famous minimap mod created by Zaneris. VoxelMap is an in-game minimap mod with a few nice features. It displays waypoints (per dimension, and per multiverse world if the server is running voxelPlugin). It also displays mob (and player) icons, with optional helmets and playernames. Waypoints can be edited or removed at any time, with an easy UI for picking their color. In SP (with commands enabled) or in MP with sufficient permissions, the user can teleport to any waypoint. Functions in the Nether. Has a handy cave mode. for underground exploration.
There are 2 versions:
- Standard version: please use Magic Launcher or MCPatcher.
- Forge version is optional, and is installed like any other Forge mod
Screenshots:


How to install:
Download and install Minecraft Forge
Download the mod
Go to %appdata%
Go to .minecraft
Go to mods folder
C:\Users\YOURUSERNAME\AppData\Roaming\.minecraft\mods folder
/Users/[Your user]/Library/Application Support/minecraft/mods on Mac folder
Drag and drop the downloaded jar (zip) file into it
If one does not exist you can create one
Enjoy the mod
Or:
Or:
----------------
Pixelmon Mod- 1.5.1 or higher - Game2share.us

What is Pixelmon?
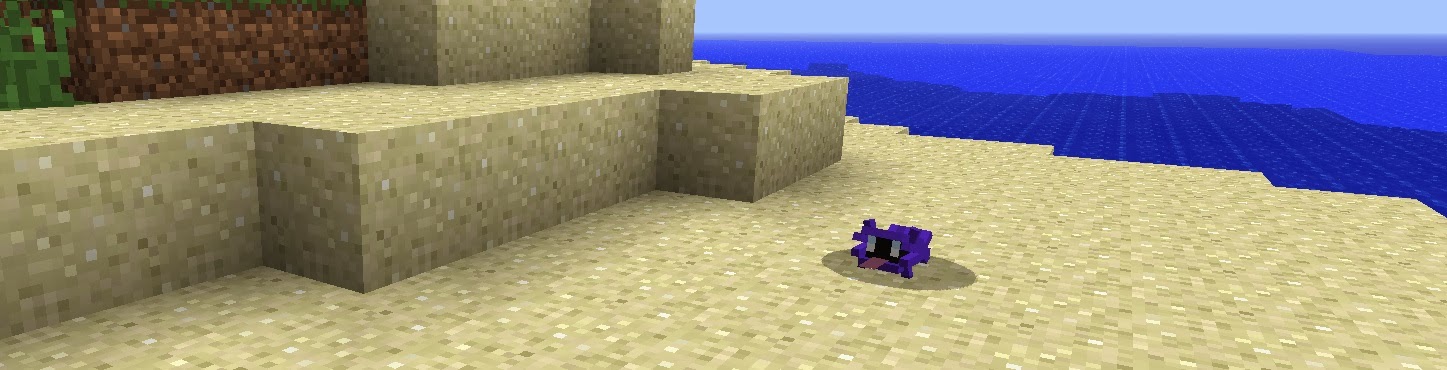
Are you a follower of the famous cartoon Pokemon? This mod is for you. It adds many awesome pokemon into Minecraft.
Pixelmon Mod Features:
204 pokemon!
Modifies NO base files (Meaning it should work with any mod)
Configuration file to change spawning amounts, Block and item ID’s
Comprehensive attack system featuring over 500 attacks (including status effects and stats modifiers)
Pokemon overlay showing current pokemon and their status
Functioning pokedex
Multiplayer supported! (including bukkit using bukkitforge)
Full PC storage system!
New Healing block!
Evolution stones!
New Capturing system!
Brand new models for pc and healer
3D pokeball and capture animation (now improved)
All Mob’s to scale as specified by the bulbapedia
Battleable Trainers
Aggression system
Friendship System (Umbreon will evolve with it)!
Hammer and anvil crafting system for pokeballs!
Pokeballs now work in battle!
Apricorn trees
More Pokeballs: Heavy Ball, Level Ball, Love Ball, Moon Ball and Friend Ball + More!
New GUI’s for battling, summary screen, and inventory, and more!
Fossil Machine for reviving fossils found around the world!
Trading! Trade pokemon with your friends! Evolve Pokemon!
Find Icy and Mossy stones throughout the world to evolve certain Pokemon!
and much, much more….!
Pixelmon Mod Screenshots:



Pixelmon Mod Video:
Pixelmon Mod Recipes:
- Go to Pixelmon Wiki
How to install Pixelmon Mod for Minecraft:
- Download the mod
- Put downloaded zip file into C:\Users\YOURUSERNAME\AppData\Roaming\.minecraft\mods folder. Do not unzip it. If you don’t have a mods folder, create one
- Enjoy the mod
Changelogs:
v3.0.1
- Added config options to disable cloner and shrines
- Made trainers immune to most damage
- Fixed a bunch of evolutions which weren’t firing (some held item, happiness and move evolution pokemon)
- Fixed a crash which could happen if a player had pre-2.5 pokemon in their pc
- Spawning is now better for a few pokemon and some spawn that weren’t
- Fixed a crash when people tried to remove west facing pc’s from pre-3.0 maps by clicking top block
- Fixed y spawn location crash
- Fixed Mist being replied repeatedly when already applied
- Fixed a trainer crash
- Built protection for a possible divide by zero in experience calculation
------------------
XEliteZ Mod Update Utility 1.7.2 - Game2share.us [1.5.2 and 1.6.4]

The XEliteZ Update Utility is a small thingy that XEliteZ mods are currently using to display the available updates.
Screenshots:


Download and install Minecraft Forge
Download the mod
Go to %appdata%
Go to .minecraft
Go to mods folder
C:\Users\YOURUSERNAME\AppData\Roaming\.minecraft\mods folder
/Users/[Your user]/Library/Application Support/minecraft/mods on Mac folder
Drag and drop the downloaded jar (zip) file into it
If one does not exist you can create one
Enjoy the mod
Or:
Or:
----------------
FrostCraft (Frozen) Mod 1.7.2 - game2share.us

FrostCraft is a mod with multiple features in a winter theme, including: mobs, blocks, items, weapons and machines.
Features:
Machines
Equipment and Tools
Blocks
Items
Mobs
Maybe a new worldtype
Enchantments
Screenshots:
Castle (currently just a tower):

A new boss, Frost Wing:


Recipes:
How to install:
- Download and install Minecraft Forge
- Download and install XEliteZ Mod Update Utility
- Download the mod
- Go to %appdata%
- Go to .minecraft
- Go to mods folder
- C:\Users\YOURUSERNAME\AppData\Roaming\.minecraft\mods folder
- /Users/[Your user]/Library/Application Support/minecraft/mods on Mac folder
- Drag and drop the downloaded jar (zip) file into it
- If one does not exist you can create one
- Enjoy the mod
Or:
Or:
Time Keeper Mod 1.7.2 [game2share.us]

This mod will sync the Minecraft time to the time outside. Keep in mind sunsets probably won’t be perfectly synced, because minecraft sunsets don’t vary based on seasons or location. However, the game will be running on a 24 hour cycle, and keep in sync, meaning you can sleep through night. In your bed.
Screenshot:

To get started in a new world, you have two options:
With NEI:
Turn on cheat mode
Find the “Time Keeper” block, give it to yourself, and place it in the world.
Without NEI:
If your world doesn’t have cheats enabled, open it to LAN with cheats on.
Type /give @p EzTimeKeeper:time_keeper
It has no recipe, and you only need one per world. However the chunk needs to stay loaded, so placing it spawn is helpful.
Config and Time Offsets:
You can find the config in minecraft/config. It is called “EzTimeKeeper.cfg. There are currently two config options. These are the block ID and the time offset.
Time Offsets allow you to change the time in game. For instance, if you always play at night, perhaps you want to reverse the time scale. If you set the time offset to 12000 then it will be day during the night, and night during the day. Minecraft time runs on a 24000 tick cycle. Meaning adding 12000 will set it ahead half a cycle. (Day -> Night, or vice versa)
The block ID can be changed if you experience conflicts. This is the same with all mods.
Mod Spotlight :
How to install:
Download and install Minecraft Forge
Download the mod
Go to %appdata%
Go to .minecraft
Go to mods folder
C:\Users\YOURUSERNAME\AppData\Roaming\.minecraft\mods folder
/Users/[Your user]/Library/Application Support/minecraft/mods on Mac folder
Drag and drop the downloaded jar file into it
If one does not exist you can create one
Enjoy the mod
or:
----------------------

